
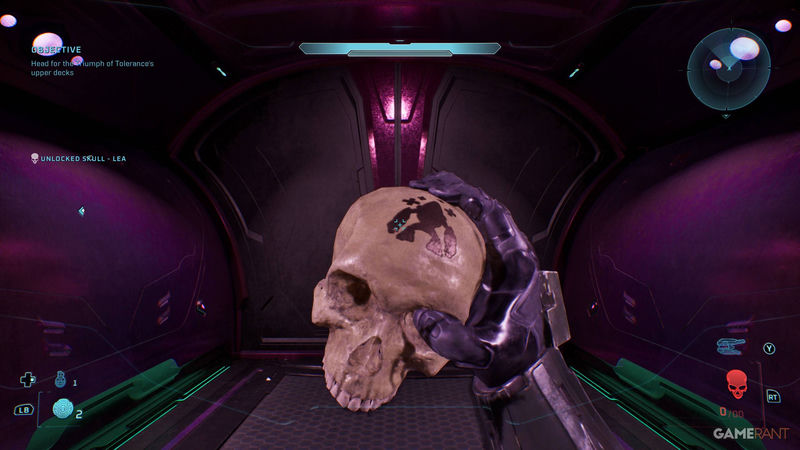
Halo Campaign Evolved Boarding Action Collectibles Guide
Halo Campaign Evolved's first Bonus Mission, Boarding Action, has four collectibles to track down: the Malfunction Skull, Johnny Ammo Seed Skull, Leadhead Skull, and The Path Terminal.
The Malfunction Skull, Johnny Ammo Seed Skull, and Leadhead Skull are the mission's skull collectibles. They do not give permanent upgrades; they change how the mission plays once active. The Path Terminal is the lore/completion pickup, and it is easy to skip if you follow the objective marker too literally.
If you miss one, reload a checkpoint or restart the mission. Boarding Action is short enough that going back is usually faster than wandering around later sections looking for side doors.
What the Boarding Action Collectibles Do
- Malfunction Skull: When you respawn, a random part of your HUD disappears.
- Johnny Ammo Seed Skull: Reloading loses the ammo left in your magazine.
- Leadhead Skull: Headshots no longer deal bonus damage or insta-kill enemies.
- The Path Terminal: The mission terminal, best grabbed for completion and lore.
That last one is the easy one. The skulls are the ones that can mess with your run, especially if you rely on headshots, careful reloads, or a clean heads-up display during chaotic firefights.
Malfunction Skull Location
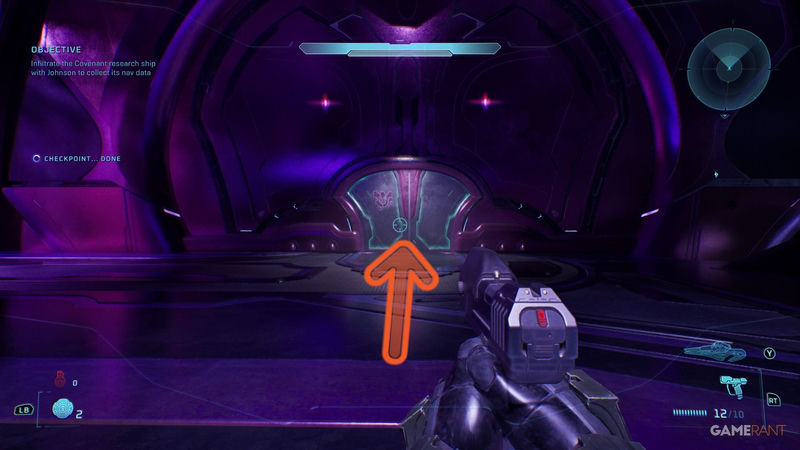
Start Boarding Action and keep moving with Sgt. Johnson until the mission forces you to fight two Hunters. After they die, Johnson will activate the grav lift, but you do not need to take it yet.
When you are facing the grav lift, cut to the right path instead. Take the stairs down toward the Covenant ship, then enter the door on the ship's right side. Through those doors, you will pass a mountable turret, so use that as your landmark.
Head past the turret toward the bridge. The Malfunction Skull sits in the middle of the bridge floor, which makes it easy to miss if you only scan the doorway or turret area.
The important detail is the trigger: Malfunction does not announce itself with a big combat change. It activates when you respawn, then randomly removes one HUD element. That can make tracking health, ammo, or target information feel suddenly messier than usual.
Johnny Ammo Seed Skull Location
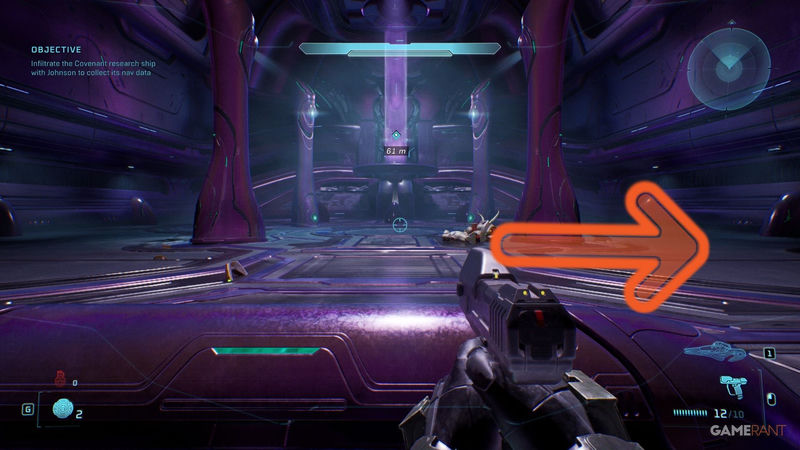
Continue through Boarding Action until you reach the training grounds. This area is easy to recognize because it has four tree-like pillars, a sand pit, and several weapons scattered around the floor.
Deal with the Covenant in the area first, then head up the stairs and follow them around to the back. You will see two doors, one on the left and one on the right. Take the left door.
Inside, you will be ambushed by Elites. Clear them before checking the right side of the room, where the Johnny Ammo Seed Skull sits on a ledge near the ground.
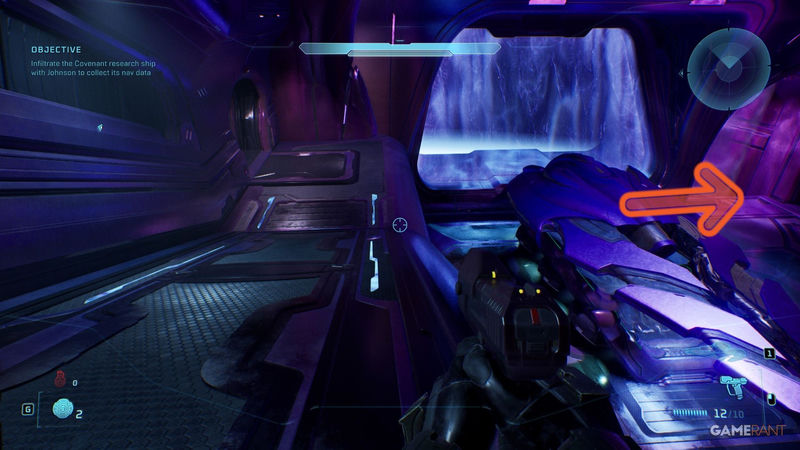
Johnny Ammo Seed is nastier than it sounds because it punishes reloads. Any ammo left in your magazine is lost when you reload, so hoarding half-charged clips becomes a bad habit very quickly.
If you were hoping the skull would hand you a weapon, it does not. Its reward is the modifier, and that modifier makes weapon management feel much more aggressive.
Leadhead Skull Location
The Leadhead Skull comes later, when the mission sends you toward the Triumph of Tolerance's upper decks. Eventually, you will clear a room full of Covenant, after which Sgt. Johnson starts working on the grav lift.
Do not enter the grav lift yet. Instead, face the lift and move into the back-left room. Follow that corridor to the end, and the Leadhead Skull will be waiting there.
This is a classic off-route pickup because the lift is the obvious next step. If you follow the objective path without checking the side corridor, Leadhead is the one most likely to get left behind.
Leadhead disables extra damage and insta-kills from headshots. That changes how you approach Covenant enemies, especially in tighter rooms where a fast headshot would normally solve the encounter before it gets complicated.
The Path Terminal Location
After grabbing the Leadhead Skull, go up the grav lift to the upper deck. Once you land, immediately turn around instead of following the objective marker forward.
Look for the door in the back-right corner of the landing area. There are two back-right doors, so take the one that leads deeper into that corner rather than the one that keeps you on the main objective route.
The Path Terminal is just inside, on the right side after you enter. It is the simplest collectible here, but it is also the easiest to miss because the mission wants you to keep moving upward.
Best Order for Clearing the Collectibles
The cleanest order is Malfunction first, Johnny Ammo Seed second, Leadhead third, then The Path Terminal last.
- Grab Malfunction before taking Johnson's grav lift.
- Grab Johnny Ammo Seed in the training grounds side room.
- Grab Leadhead before continuing up the next grav lift.
- Grab The Path Terminal right after the final lift section.
In co-op, one player can follow the objective while the other checks side rooms and doors. That is especially helpful for Malfunction and Leadhead, because both are tucked away from the main route.
Why These Collectibles Change the Mission
Halo skulls have always been about turning familiar combat into a personal challenge. Boarding Action uses that tradition well because each skull targets a different habit: HUD awareness, reload discipline, and headshot reliance.
Malfunction makes respawns feel more punishing because it hides information when you come back. Johnny Ammo Seed makes ammunition feel less forgiving, which matters most in weapon-heavy fights. Leadhead removes the shortcut value of instant headshots, forcing you to clear enemies with more deliberate positioning.
That is why these collectibles matter beyond completion. They do not just add a checkbox; they change how you move, reload, and aim through one of Campaign Evolved's more compact missions.
Grab the Malfunction before the first lift, the Johnny Ammo Seed before leaving the training grounds, the Leadhead before the next lift, and The Path Terminal right after it. That route keeps the mission clean, avoids backtracking, and makes the whole collectible hunt feel like a proper Halo challenge run.





Comments (0)
Loading comments…