
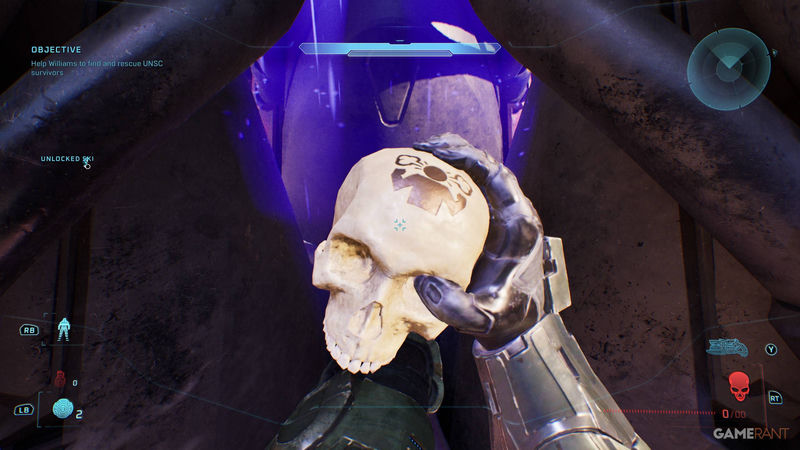
There are four collectibles in Halo: Campaign Evolved’s Bonus Mission, “The Most Dangerous Game”: the Temperamental Skull, Recession Skull, Penitent Report Terminal, and Ghost Skull.
The trickiest one is Temperamental because it does not appear immediately. You have to spot the same high-value Elite three separate times, break his shields on each encounter, then clear the final area to make the skull spawn.
If you want the shortest possible answer: Temperamental requires three high-value target encounters, Recession is behind the explosive boxes on the bridge, Penitent Report is in the side room before the third target, and Ghost is on the purple pillar after the grav bridge.
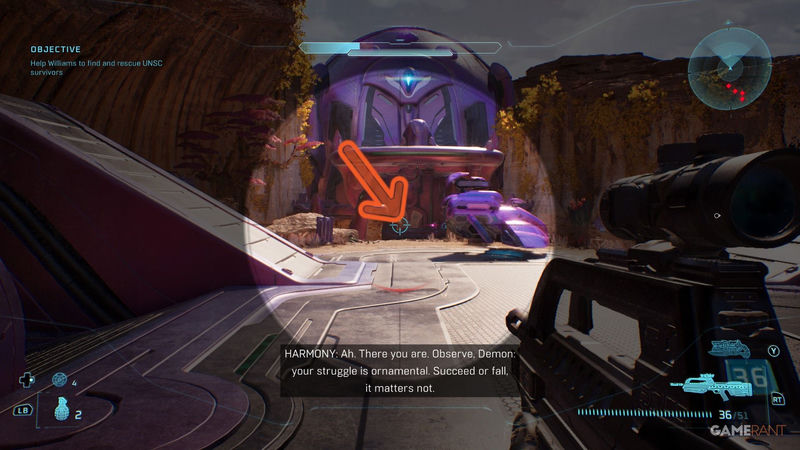
The Most Dangerous Game Collectibles at a Glance
- Temperamental Skull: Find the high-value Elite three times, break his shields each time, then claim the skull after the final fight.
- Recession Skull: Destroy two explosive boxes on the pillars outside the locked purple room near the bridge.
- Penitent Report Terminal: Enter the side room before the third high-value Elite encounter.
- Ghost Skull: Climb to the purple pillar after crossing the grav bridge and entering the next enemy-filled area.
These collectibles matter because Halo skull effects can change how a familiar mission plays. Temperamental makes friendly fire from allies faster, Recession makes every shot cost two bullets, and Ghost removes the usual flinch enemies get when shot. The terminal does not change combat directly, but it adds lore context for players who care about the mission’s story beats.
Temperamental Skull Location
The Temperamental Skull is only obtainable after you break the shields of a high-value Elite on all three encounters. Bring a ranged weapon, because this target runs, takes cover, and escapes before you can simply rush him down.
The safest approach is to treat each sighting like a required checkpoint. You do not need to kill the Elite, but you do need to deal enough damage to break his shields before he disappears.
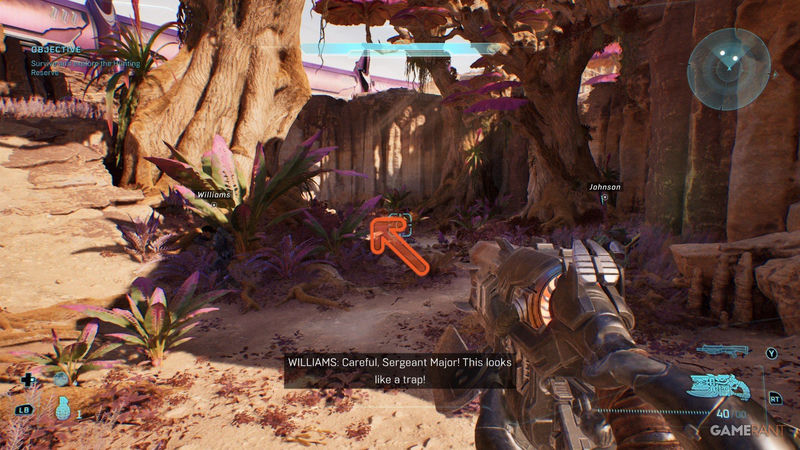
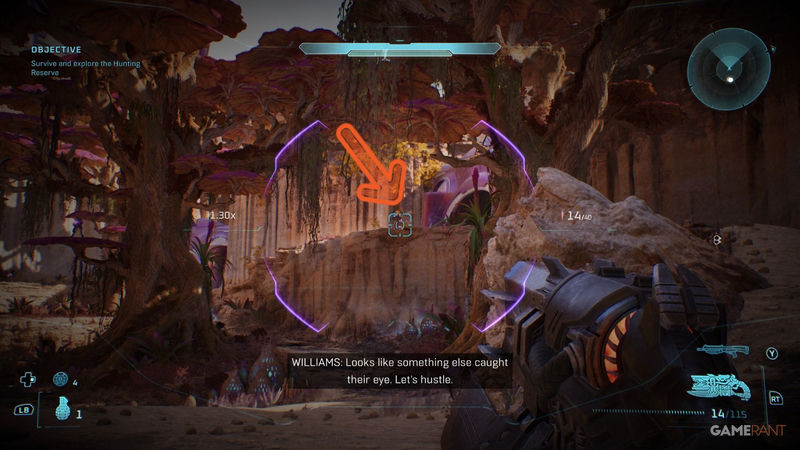
Temperamental Encounter 1: Forest Ledge After Williams
After saving Williams and her squad, keep moving through the mission’s linear path. You will pass Brutes outside, enter the canyon, and then follow the route into the forest with purple trees.
As soon as you enter that forest area, look up to the ledge on your right. The high-value target Elite is standing there, and you should shoot him from range until his shields break before he escapes.
If you miss this first sighting, do not panic, but do not move on casually. Replay from the start or from the mission checkpoint and stop at this ledge before continuing. The skull only becomes available after all three shield breaks are registered.
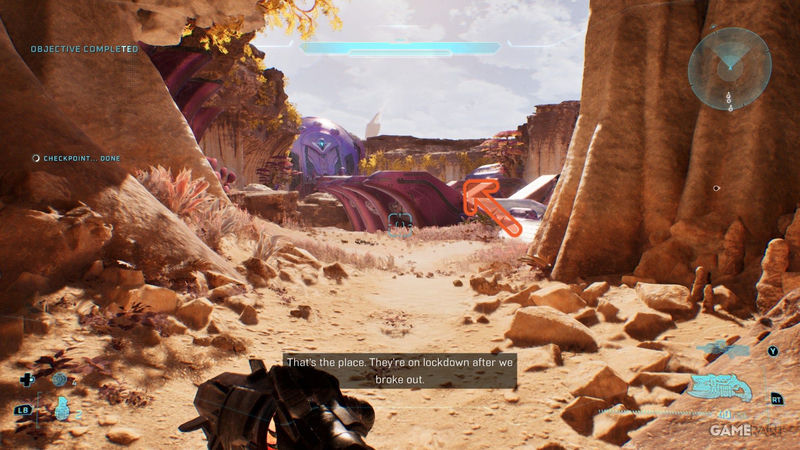
Temperamental Encounter 2: Bridge Near the Locked Door
After the first encounter, continue along the path toward the large bridge. The high-value target appears at the end of the bridge, near a locked door and to the left of a Wraith tank.
This is the encounter where rushing matters. Get eyes on him quickly, then shoot him from a distance before he escapes. You do not need to clear every enemy around him, but you do need to land enough damage to break the shields.
Penitent Report Terminal Location
Before hunting the final high-value target, follow the main objective until you free UNSC soldiers from prison cells. Continue past the armory until you reach a door with a large ramp leading up into a room with glass windows on the left.
When you are in that room, ignore the main objective and take the door on the right. The Penitent Report Terminal is inside.
Grab the terminal before continuing to the final Temperamental encounter. It is easy to miss because the mission keeps pushing you forward, but it is required for the third high-value target sequence.
Temperamental Encounter 3: Upper-Left Building After the Prison Block
After obtaining the Penitent Report, continue through the prison block until you exit back outside. As soon as you leave the building, look to your left and you will see the high-value target Elite on an upper-left building.
Break his shields again, then clear the surrounding enemies. Once every enemy is dead, the Temperamental Skull will spawn inside the central structure shown in the mission area.
Jump up to the skull and crouch to collect it. This final step is simple once the fight is over, but the timing can be misleading if you assume the skull appears as soon as the Elite’s shields drop.
Temperamental Skull Effect
The Temperamental Skull makes allied UNSC units attack you more quickly after you kill a soldier. In practical terms, it turns friendly fire from a slow, occasional threat into something much more immediate.
This skull is most useful if you want the mission to feel less predictable. It does not make combat impossible, but it does reward careful positioning because your own allies can become a faster hazard than they normally are.
Recession Skull Location
The Recession Skull is found near the large bridge where you fought the second high-value target. When facing that bridge, turn around and look for a locked purple room with two pillars on either side of the door.
Look up at those pillars. Each one has an explosive box you can destroy, and both boxes need to be exploded before the door opens.
Once the two explosive boxes are gone, enter the purple room. The Recession Skull is sitting inside, waiting for the door to open.
Recession Skull Effect
The Recession Skull makes every shot cost two bullets. That changes weapon math across the mission, especially for rifles, SMGs, and other ammo-hungry weapons.
The effect is annoying in a very Halo way because the solution is not complicated, but it is noticeable. You will likely find yourself conserving shots, switching weapons more often, and treating ammo pickups with extra respect.
Ghost Skull Location
The Ghost Skull appears after you deal with the Banshee attack and cross the grav bridge. Johnson and Williams will talk before the doors unlock to the next area.
As soon as you enter that new area, turn around and look up. The skull is attached to the purple pillar on the right side of the doorway.
You have two main options for reaching it. The risky option is to throw a grenade at your feet, jump about 2.5 seconds later, and use the blast to launch yourself upward.
The easier option is to head left toward a large tree and climb the wall indents. From there, continue along the branch and wall ledges near the purple pillar until you can jump safely onto the skull platform.
Ghost Skull Effect
The Ghost Skull makes enemies stop flinching when shot. This removes a small bit of feedback from ranged combat, because enemies will not stagger or react as clearly to hits.
The effect is less disruptive than Recession, but it can still feel strange if you are used to the normal hit reaction. It makes the mission feel slightly smoother, but also a little less readable during crowded fights.
Best Order to Grab These Collectibles
The cleanest route is to follow the mission normally and collect the Penitent Report Terminal before the third high-value target. That keeps the Temperamental sequence organized and prevents you from wandering past the final encounter without having what you need.
For the skulls, prioritize Temperamental first because it requires the most tracking. Then grab Recession at the bridge, and save Ghost for the grav bridge area. That order follows the mission flow and avoids unnecessary backtracking.
If you are playing with friends, split up only after you understand the layout. Temperamental is the one place where cooperation helps, because one player can watch the high-value target while another lines up shots.
Quick Tips for All Three Skulls
- Use a ranged weapon for Temperamental. Close-range fights make the high-value Elite easier to lose.
- Break shields, not health bars. You only need enough damage to make the Elite’s shields drop.
- Check both sides of the bridge. The Recession Skull is not in the obvious forward path.
- Do not skip the side room. The Penitent Report Terminal is easy to miss if you stay focused only on the main objective.
- Climb instead of grenade-boosting for Ghost. The wall indents are safer than trying to time a jump after a grenade blast.
The Most Dangerous Game is a compact bonus mission, but its collectibles are not all placed in obvious spots. Temperamental in particular turns the mission into a small scavenger hunt, while Recession and Ghost reward looking away from the main objective at the right moments.
Once you have all four, the mission becomes less about finding what is missing and more about enjoying the difficulty modifiers. Temperamental adds chaos, Recession punishes careless shooting, and Ghost makes enemy reactions feel flatter. Together, they give the mission a few extra reasons to replay it after the main collectibles are done.



Comments (0)
Loading comments…